Intermediate Tutorial - Using the Dorian GrayII Lake Applet
This tutorial assumes that you have downloaded the Dorian GrayII Java Lake applet - you will need the file 'DorianGrayII.class'. If you haven't already got it you can download it by clicking the link above
First step is to find a suitable picture to lake. Look for a .jpg file since these give better image quality for photographs. You can use a .gif file if you wish.
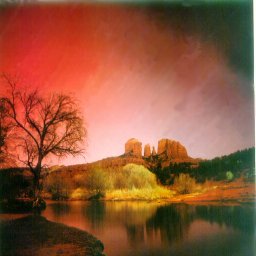
Here's the one which we are going to use. The file name is 'Arizona.jpg'
 |
 |
|
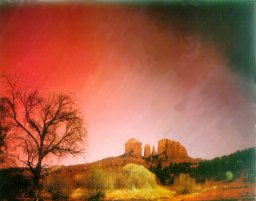
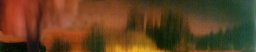
| In this first picture, we've used the clone brush to remove the bottom
left hand corner of the image and soften the result. Oops, shouldn't there
be a tree in the reflection? - Back to PaintShop Pro |
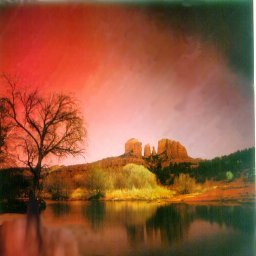
In this image, we selected, using the lasso, the outline of the tree and pasted it as a transparent image into the water. This was then flipped, darkened slightly, blurred using the motion blur and softened. It's not perfect, but this does not matter when laked. |
 |
|
|
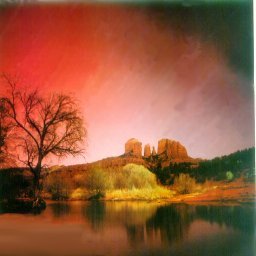
The image has been cropped at the shoreline where we wish the reflection to start. We've used this image in versions one and two. |
| <IMG SRC="Arizonabk.jpg" HEIGHT=201 WIDTH=256 alt="Sedora, Ariona" /> | This is the image that will be placed above the lake. The alt="Sedora, Ariona" is a description of the picture |
| <BR /> | This code forces a line break. Normally, it's followed by (non breaking space code) but in this case, we don't want one. If the code is going in a table and you are using Netscape Composer then beware of this code being inserted and causing a gap in your applet. |
| <APPLET code="DorianGray_II.class" align="top" WIDTH="256" HEIGHT="120"> | This is the start of the applet. Here you enter the width and height of the image. The width must be the same as the width of your picture, the height can be anything up to a little less that the original height of the image. If you make it too tall, you'll get a white patch lapping under your applet. Beginner's often make this mistake. |
| <PARAM name="bgcolor" value="FFFFCC"> | Here, you can set the colour of the background displayed while the applet loads the reflection. If you leave this out the default is black. |
| <PARAM name="image" value="Arizonabk.jpg"> | This parameter sets the file to be used for the reflection. In this case, it's the same as the image above. |
| <PARAM name="loadtext" value="Arizona Aurora"> | This parameter allows you to display some text while the applet loads the reflection. If you leave it out you'll get the default 'applet loading...' |
| <PARAM name="textcolor" value="ff0000"> | This parameter sets the colour of the loadtext. The default colour for this is red. |
| <PARAM name="mode" value="0"> | This parameter regulates the ripples in the reflection, where 0 has the most ripples and 5 has the least. If you leave this parameter out, it will default to 0. |
| <PARAM name="speed" value ="3"> | This parameter regulates the speed of the ripples and varies from 1 to 5, with 1 being the fastest and 5 the slowest. If you leave this parameter out, it will default to 3 |
| <PARAM name="frames" value="12"> | This parameter sets the number of 'frames per second' the applet displays, and can vary between 9 and 14, with 14 being the smoothest, but taking the longest to load. If you leave this parameter out, it will default to 12. |
| <PARAM name="status" value="Please wait...applet is loading"> | This parameter sets the message in the status bar while the applet is loading. If you leave it out, it will default to 'Welcome to the Dorian Gray Applet II'. |
| <PARAM name="outtext" value="mail me if you like it"> | This parameter displays a message when the mouse leaves the applet. If you leave it out, it will default to 'mail me if you like it'. |
| <PARAM name="intext" value="Click me, and you might hear somehting"> | The parameter displays a message when the mouse is moved over the applet. If you leave it out, it will default to 'Click me, and you might hear something'. |
| <PARAM name="sound" value="brook1a.au"> | This parameter allows you to add sound to your applet when someone double clicks on the reflection. Sound is not played if you set an 'href' parameter. |
| <PARAM name="text" value="Like the Java?..."> | The parameter sets the text which is displayed when you click on the applet. If you leave it out, it will default to 'Hey, Why are you clicking me ?#?!...'. Since we find this a little offensive, we always change it. This message is not displayed if you set an 'href' parameter. |
| <PARAM name="href" value="http://www.jaydax.co.uk"> | This parameter is used to enter the URL which will be jumped to if the image is clicked on. This parameter is optional and disables the sound if it set. |
| <PARAM name="target" value="_self"> | This parameter sets the target frame of the URL, set with 'href'. This parameter is optional and will default to '_self' if omitted. |
| </APPLET> | The end of the applet code |
| <IMG SRC="Arizonabk.jpg" HEIGHT=201 WIDTH=256 alt="Sedora, Ariona" /> | This is the image that will be placed above the lake. |
| <BR /> | This code forces a line break. Normally, it's followed by (non breaking space code) but in this case, we don't want one. If the code is going in a table and you are using Netscape Composer then beware of this code being inserted and causing a gap in your applet. |
| <APPLET code="DorianGray_II.class" align="top" WIDTH="256" HEIGHT="46"> | This is the start of the applet. Here you enter the width and height of the image. The width must be the same as the width of your picture, the height can be anything up to a little less that the original height of the image. If you make it too tall, you'll get a white patch lapping under your applet. Beginner's often make this mistake. |
| <PARAM name="bgcolor" value="FFFFCC"> | Here, you can set the colour of the background displayed while the applet loads the reflection. The default is black. |
| <PARAM name="image" value="ArizonadgIIv3.jpg"> | This parameter sets the file to be used for the reflection. This time it's different. |
| <PARAM name="loadtext" value="Arizona Aurora"> | This parameter allows you to display some text while the applet loads the reflection. The default is 'applet loading...' |
| <PARAM name="textcolor" value="ff0000"> | This parameter sets the colour of the loadtext. The default colour for this is red. |
| <PARAM name="status" value="Please wait...applet is loading"> | This parameter sets the message in the status bar while the applet is loading. If you leave it out, it will default to 'Welcome to the Dorian Gray Applet II'. |
| <PARAM name="text" value="Like the Java?..."> | The parameter sets the text which is displayed when you click on the applet. If you leave it out, it will default to 'Hey, Why are you clicking me ?#?!...'. Since we find this a little offensive, we always change it. This message is not displayed if you set an 'href' parameter. |
| </APPLET> | The end of the applet code |
Now let's see what this looks like this time:
So what about version three? Well, in that version, instead of using the image above the applet, you use yet another applet. The link below takes you to a page which displays our image using the huerot (hue rotate) applet. Below it, we use the Dorian GrayII Applet to display the water.
See version three using the Dorian GrayII applet and the Anfy huerot applet
You can find more details about the Dorian Gray II applet here.
There, simple wasn't it? Have fun, but if you run into problems, feel free
to email
us for help :)
For a VERY small fee, we'll even do
it for you!