Converting old photographs to colour - A tutorial

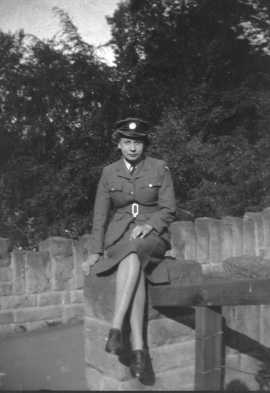
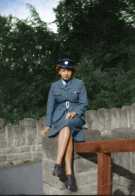
The initial black and white positive compared with the final colour image.

Looking through a box of old photographs my mother had given me I came across a negative print of her wearing a WRAF uniform and obviously taken in the 1939-1944 war. I remembered seeing the negative before but had never seen a positive. When I asked my mother about it she told me it was a picture a friend had taken of her. She had the negative but had never seen a print of it and 'you can't get them printed today'.
I decided to see what I could do with the picture using Paint Shop Pro. This is a program I've used for years and come to like better than PhotoShop since it's a lot less complex, less expensive, yet still offers all the facilities I need.
First step was to scan the image. The scan at 2400 dpi was 5408 x 7872 pixels and 40.6 Mbytes. I recommend the Epson scanner shown left if you haven't got one. It's currently (Sept 2007) an 'A list' product at PC Pro (My favourite PC Magazine)
 Next
I used Colors > Negative Image to get a positive, for the first
time seeing a normal image.
Next
I used Colors > Negative Image to get a positive, for the first
time seeing a normal image.
At this point I resized the image to 20% of its original size producing an image 1082 x 1574 and now a more manageable 1.6 Mbytes in size
Using Colors > Adjust > Brightness/Contrast I next increased the contrast by 15% leaving the brightness at 0%. My aim was to get the improvement in contrast I required without making the tree area too dark.
Although the image was fairly clear of imperfections since the original had lain undisturbed in a box for 60 years, I now used the clone brush to clear up dust marks and a fingerprint on the path. I zoomed in on the original 2:1 and used a round brush of 5-12 pixels size and 50% hardness. This method takes longer than Effects > Enhance Photo > Automatic Scratch Removal but in my opinion works better. It was also at this point I discovered my mother had freckles when she was younger.
 The
resultant image was a big improvement on the original negative -
but why stop there? Next stage was to convert it to a colour photograph!
The
resultant image was a big improvement on the original negative -
but why stop there? Next stage was to convert it to a colour photograph!
The first step in this stage was to use the Magic wand and lasso (freehand selection) tool to select the different areas of the image and save the selections.
First the magic wand was used with tolerance set at 30 to select the sky areas. Holding down Shift while clicking with the wand tool allowed me to select areas where the sky appeared through the trees. There is no need for great accuracy at this point. Once the bulk of the sky had been selected the selection was expanded by 1 to pick up loose pixels of sky. The sky area was saved as sky.sel using Selection > Save to Disc...
Next the selection was cleared (using Ctrl D) and the magic wand, this time at a tolerance of 15, was used again to select just the areas of sky without tree branches. To clear up loose pixels this time the lasso tool, set point to point and with feathering set to 2, was used while holding down the shift key. The selection was then inverted - Selection > Invert. Next the rectangle and lasso tools were used this time holding down Ctrl to deselect the remaining non-foliage areas. This step takes time and care so it was worth while saving the selection to disc as 'foliage.sel' periodically.
The sky area was then added to the foliage selection using shift and the rectangle selection tool. Again the selection was inverted (Selection > Invert) and the rectangle and lasso tools were used to select the wall areas of the image and save the selection as 'wall.sel'.
In a similar way selections were made of path.sel, skin.sel, hair.sel, fence.sel and uniform.sel. When selecting the uniform care was taken not to include the buckle, cap badge or buttons.
 |
 |
 |
 |
 |
 |
|
sky |
foliage |
wall |
fence |
skin |
uniform |
Having made and saved selections the final stage was to increase the number of colours to 16 Million. The selections were reloaded one by one and promoted to a layer. I made sure I selected the background layer before loading each selection. The layers were named and stacked in the order shown below.
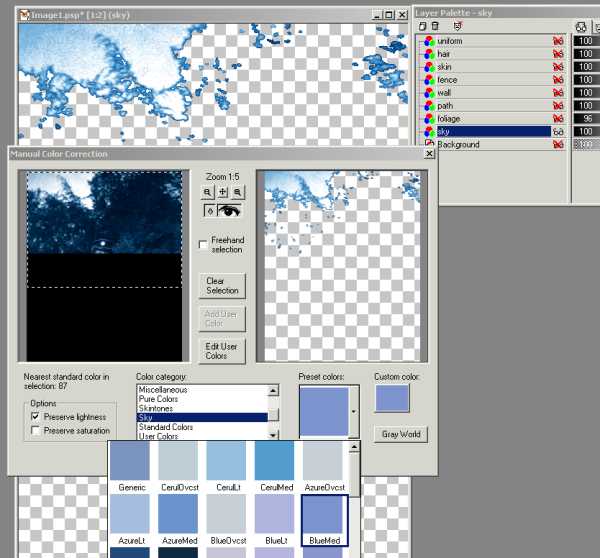
The 'sky' layer was now selected and all other layers made invisable. I chose Effects > Enhance Photo > Manual Color Correction. In the window which opened I choose 'Preserve lightness' but not 'Preserve saturation'. 'Sky' was selected as the 'Color category' and from the 'Preset colors' I chose 'BlueMed'. To see the effect I found I needed to select the entire area in the left hand pane.
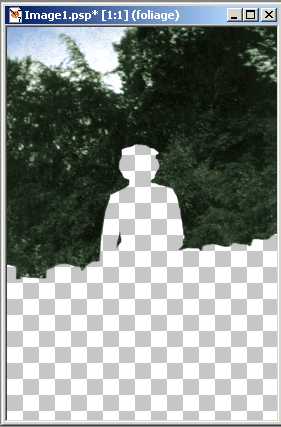
Next I selected the foliage layer and in the same way coloured it using the 'Foliage' setting and 'LushGEvrgr'. My picture now looked like this:
In the same way I selected the path, fence, wall, skin, hair and uniform layers and coloured them using the settings in the table below:
|
Layer |
sky
|
foliage |
path |
wall |
fence |
skin |
hair |
uniform |
|
Category |
Sky |
Foliage |
Metals |
Metals |
Woods |
Skin |
Skin |
Fruits |
|
Preset |
BlueMed |
LushGEvrgr |
Pewter |
SilverDull |
WalnutNat |
CaucNormLt |
CaucPink |
Blueberry |
The end result was a colour photograph from a time when colour photography just wasn't available! Mum loved the picture - she had it framed, but I won't tell you where she hung it. Suffice it to say she looks at it every day- several times.
