Hubble Bubble Toil and Trouble
In this tutorial I will show you how to take a picture and alter it a little. In it you’ll be:
- Scanning an image
- Working with bitmap images
- Importing clipart
- Editing
- Drawing freehand shapes
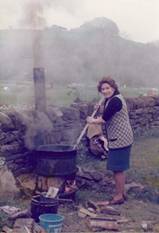
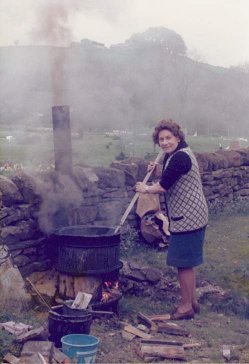
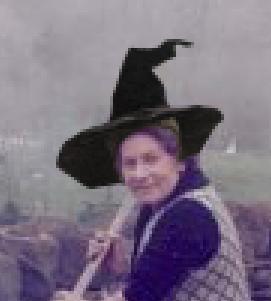
Now let me tell you a little about the original image. It’s a picture I took in 1978 when my mother was helping to put the roof on a house extension. Here you see her stirring a tar boiler, melting the pitch for a flat roof. Now you must promise me… Don’t tell Mum what we are doing to her picture!
To get the original picture into the computer it was scanned.
You will need a copy of the picture. You can get it by right clicking this link and choosing ‘Save image as …’
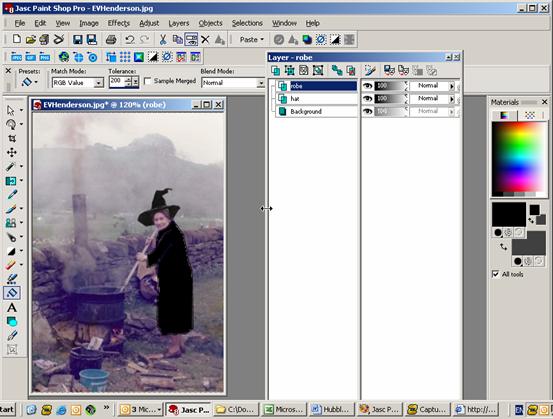
Open PaintShop Pro and load the saved image into it.
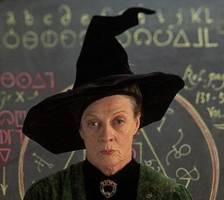
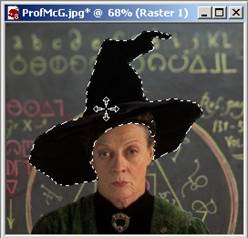
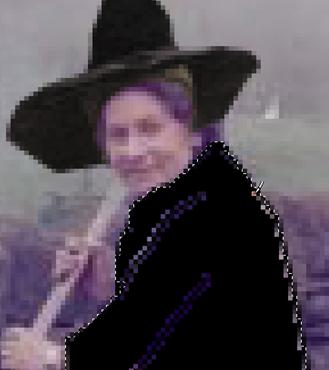
Lets start with the new hat for Mum. I stole it from the Web. Now where would we find a picture of a witches hat? Yep – Harry Potter websites. I looked for a picture of Professor-McGonagall (Maggie Smith)
Here’s the picture I found. You can right click on it and copy it, change to PaintShop Pro and paste it as a new image (Ctrl V).
We just need the hat. Use the Magic Wand tool with a tolerance setting of 42 and feather of 0 to make a selection from the image.
There are a few missing pixels at the right of the picture. These can be added to the selection by using the lasso tool, holding down a shift key and drawing round them.
Now that you have the selection you need to improve it’s contrast. If you are using PSP8 use Adjust > Brightness and contrast… > Automatic Contrast Enhancement… using the default settings to do this. If you are using PSP 7 it’s Effects > Enhance Photo > Automatic Contrast Enhancement… with Bias set to 'Darker', Strength set to 'Normal' and Appearance set to 'Flat'.
Copy the selection using Ctrl C
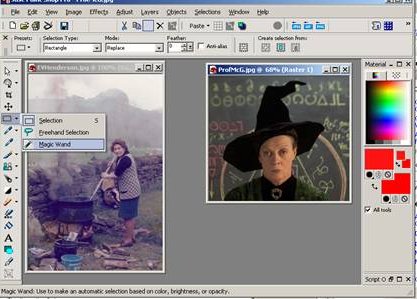
Click in Mum’s picture and use Ctrl L to paste the selection into it as a new layer.
We don’t need the ProfMcG image any longer so you can close that now.
The new layer will be far too big so our next step is to resize this layer only. To do this go to Image > Resize. Set about 20% and remove the tick next to ‘Resize all layers’
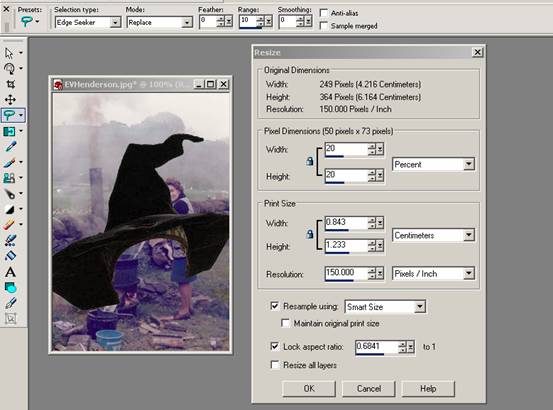
Having got the hat the correct size you can now click on it to select it and then drag it to the correct position.
 The image is a little small to work with so now is a good time to zoom in to about 300%. If you have a scroll wheel on your mouse just point at the hat and rotate the wheel, if you don’t have one then you will need to use View > Zoom to set this.

As you can now see the hat isn’t quite in the right place so you can now reposition it to get things right.
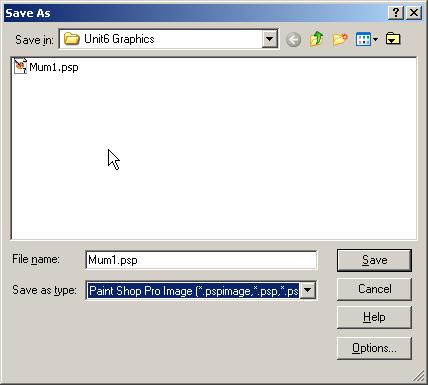
Now for the flowing witch gown. This time I couldn’t find anything suitable on the Web so the gown has to be drawn in. This is a good time to save the work done so far. Since we want to keep the layers for the moment. Use File > Save as… to save the picture as a PSP file
Print a copy of the picture now. We’ll draw on it in pencil. A draft quality black and white copy will be fine. You don’t need any great artistic skills to draw in the outline of the robe. It should cover all of Mum’s clothes though. Once you are happy with it you can use it as a guide to draw the outline of the robe.
Create a new layer. If the layer window is not on screen you can get it by pressing F8 (if using PSP8) or ‘L’ (if using PSP7). At the top of the layer window find and click the button labelled ‘New Raster Layer’ (PSP8) or ‘New Layer’ (PSP7). Give this layer the name ‘robe’.
Select the pen drawing tool. You should set it’s options to:
![]() (PSP8)
(PSP8)
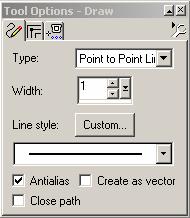
or (PSP7)
Draw in the outline of the robe using your printout as a guide. Don’t worry if it’s not exact since a little bit of irregularity will make it more realistic.
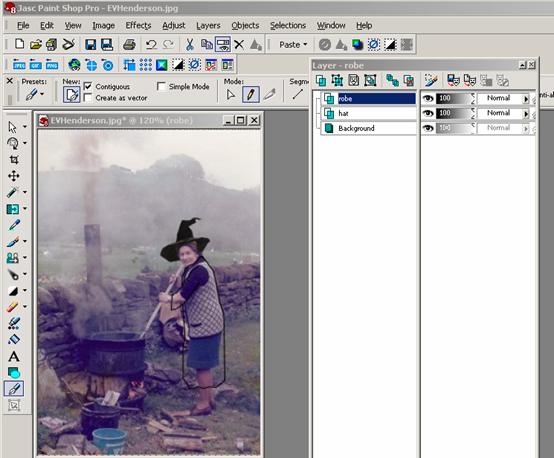
The next step is to select the magic wand selection tool, setting it’s tolerance to 0. Click inside the robe area and fill it with black. At this stage you will quickly find out if your outline contains any gaps! Remember you can use the undo tool if required.
Now if you look carefully you will see that the edge of the robe has a double line. Zoom in to see it clearly and use Selections > Modify > Expand. Set the number of pixels to 1. Now paint in the outer edge of the robe selection with the paintbrush to get rid of it. You’ll need the paintbrush set to black and 1 pixel in size. This will prevent you painting over the robe edge. Don’t paint the edge of the sleeve though since you want it to stand out against the robe
 .
.
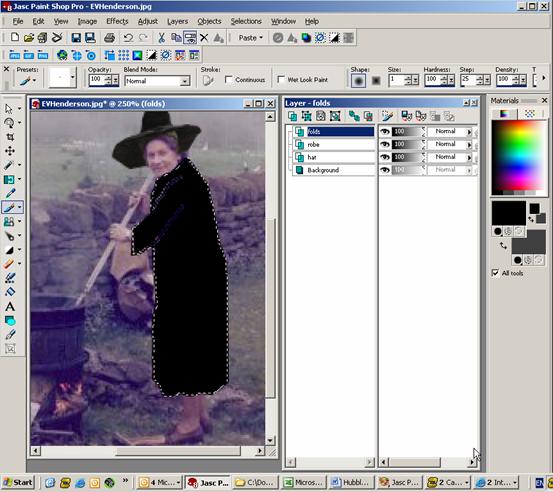
It’s now time to add yet another new layer. I’ve called this one ‘folds’. It will be used to make the folds in the black robe seem more realistic.
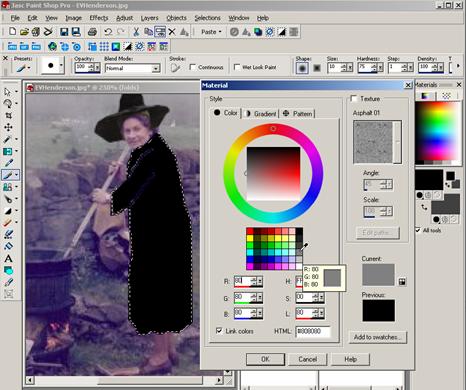
Once you have created the new layer. Select the paintbrush tool, set it to 10 pixels size, hardness of 75% and its colour to a mid grey (R80 G80 B80)
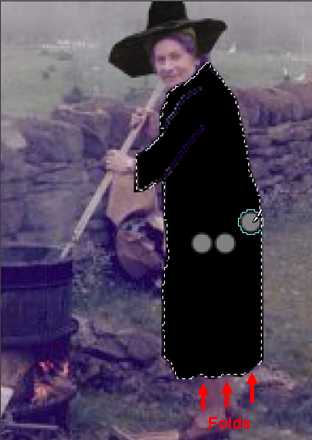 You now need to dot in three blobs of grey at the positions shown. Notice they are positioned above the folds at the bottom of the robe.
Now select the retouch tool. And select ‘Smudge’ from it’s options. I set mine to size 40, Hardness 20, Step 1, Density 100.
Drag the smudge tool straight up and down over the grey blobs to make grey smudged streaks on the robe. If you don’t get it right you can often go over it again and you can always use undo to start again.
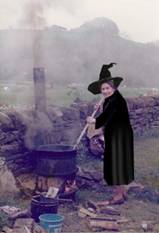
All you need to do now is to remove the selection. You can do this with Selections > Select none. Save the image and …
‘Hubble Bubble toil and trouble…’
